When migrating from DiffPlug 1 to DiffPlug 2, there are few major UI reorganizations, and also some conceptual reorganizations.
Replaced the browse bar with the entity console
In DiffPlug 1, the browse bar is a path explorer for various filesystems with auto-completion. In order to access it, you first had to open the DiffManager.
In DiffPlug 2, it has been replaced by the entity console, which is always visible at the top of the screen.
Moved the diff list
In DiffPlug 1, the diff list was stuck on the DiffManager. You could add things to the diff list by dropping them on the DiffManager's button.
In DiffPlug 2, the diff list is always at hand. If you drag a file onto the diff list, it will open automatically. When you move the mouse off of the diff list, it will close automatically.
Command console
DiffPlug 1 was heavily driven by button and menus. The upside of this is that it's easy to see what options are available, but the downside is that they always consume space, whether they're relevant to the task at hand or not.
In DiffPlug 2, most buttons and menus have migrated to the Command Console. Press Ctrl+Shift+P or the ![]() icon to open the Command Console.
icon to open the Command Console.
Config library
In DiffPlug 1, whether a given setting could be imported or exported was haphazard - some were easy to export and import, others were impossible. It was also hard to manage multiple settings, except by importing a given settings file each time we started a diff.
In DiffPlug 2, all of DiffPlug's configuration is unified into the Config Library. This allows all configurations to be shared, saved, and even diffed using a familiar interface.
Command line improvements (dp)
DiffPlug has always had the dp utility for automating DiffPlug and integrating with 3rd party tools. However, it was limited to command of the following kind:
dp %file1 %file2 --commandname
Because there was no way to pass non-file arguments, this led to absurd commands for evenly mildly complex situations, such as Simulink report export.
dp {left} {right} {reportDestination} [optional Simulink config] --Extra,SimulinkDiffExportIMG_PER_DIFF_PDF
The new dp utility is much more flexible, and allows for easy self-documented commands.
cmd> dp
You must specify a command.

usage: dp <command> [args ...]

'dp help <command>' for more info.  Available commands:
add           Adds the given paths to the palette
cat           Dumps an entity's binary content to standard output
slurp         Slurps standard input into the given entity
ext           Integration with external vcs clients (open, diff, and merge)

cmd> dp help ext
Integration with external vcs clients (open, diff, and merge)

usage: dp ext -before FILE [-after FILE] [-ours FILE] [-theirs FILE] [-result FILE]
-before FILE : base file
-after FILE  : 2-way diff - file after change
-ours FILE   : 3-way diff - file after our changes
-theirs FILE : 3-way diff - file after their changes
-result FILE : editiable version of file, converts diff to merge

<Further docs>
See the command line docs for more details.
Directed diff vs symmetric difff
- A symmetric diff has a left and a right, which are interchangable.
- A directed diff has a before and an after, which define an ordering.
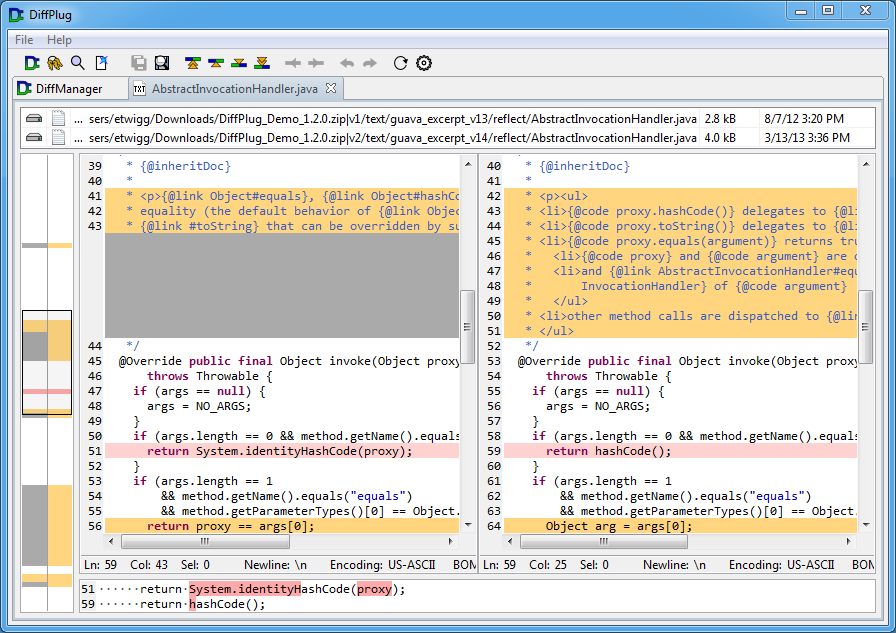
By having a clearly defined before and after, we can take vague changes like "added to the left/right" and turn them into the more useful "added/removed". In DiffPlug 1.x, all diffs were symmetric, but in DiffPlug 2.x they are all directed. For example, here's how text diff looked in DiffPlug 1...
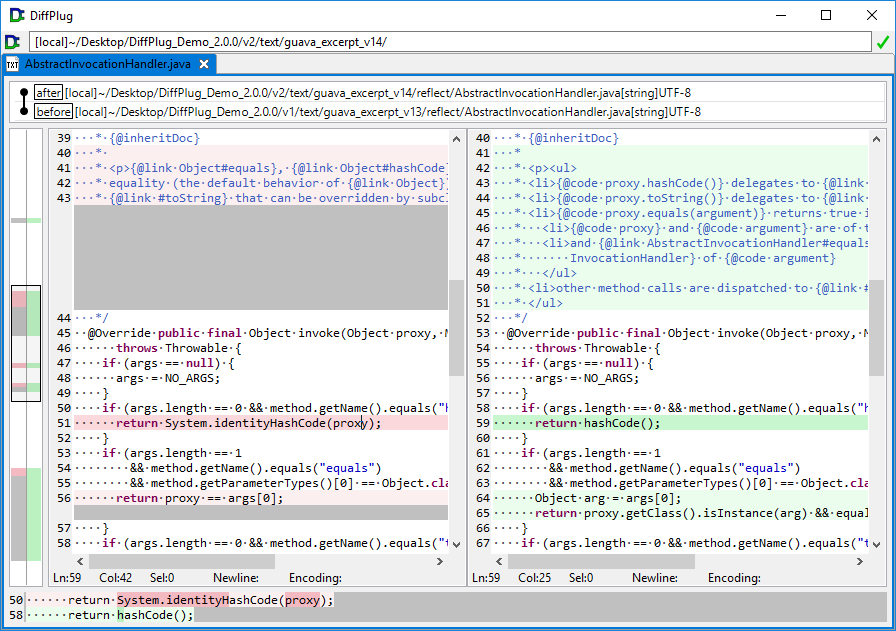
...versus how text diff looks in DiffPlug 2.
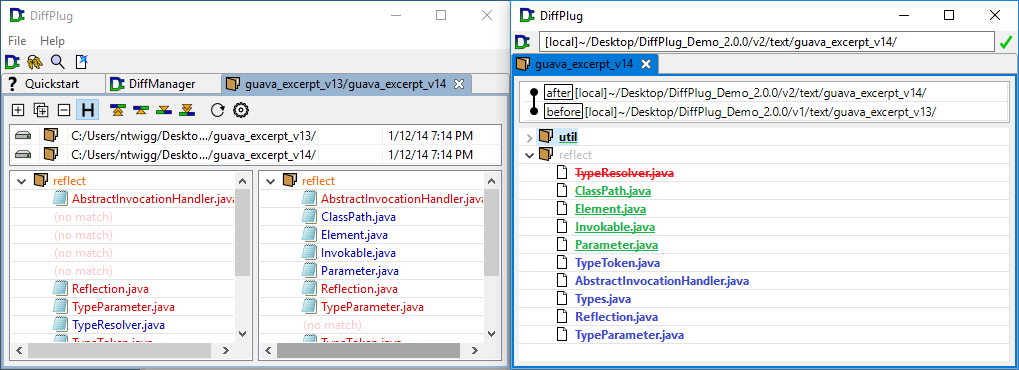
Another advantage of directed diffs is that you can show them in less space. For example, here is a folder diff in DiffPlug 1.x versus 2.x.
Legend
In DiffPlug 1.x the symmetric diff legend did not allow us to distinguish "added" from "removed":
- Green means the elements are the same.
- Red means the elements are different.
- Blue means the elements exist on only one side (they were added).
- Grey indicates that these elements are beyond the edge of the diff. Usually they are the children of Blue elements.
- Orange represents elements which are the same at this level, but contain children with Blue or Red elements.
In DiffPlug 2.x, all diffs are now "directed", so that "addition" and "removal" are always clearly defined. The following colors and font styles are used to encode a diff:
- added
- removed
- changed
- identical
In some cases, these can be mix and matched. For example, if an element named SystemGain were renamed to SysGain76, it would look like this:
- SystemGain76
The color is blue, because the element changed (it was renamed), and the change in the name is encoded using font styles.